Wednesday 26 November 2014

Tutorial - Christmas Ribbon Decorations


Today's tutorial shows how easy it is to make stunning Christmas decorations using ribbons. This is an ideal project to use up some of your wadding & fabric scraps as well.

Materials needed:
Ribbons (gross grain or satin, any width, patterned or plain)
Wadding scraps
Fabric- for base piece plus backing
Buttons (optional)
Thread
Decoration shapes on paper
Equipment needed:
Machine
Scissors
Thread
Pins
Needle to hand sew closed
Machine feet - normal to attach ribbon + 1/4" to sew decorations
**if you have difficulty attaching ribbon, use your walking foot if you have one** (I found it easier to do this with some ribbons)

Step 1:
Choose your shapes - there are so many options, draw your own, look in colouring books, or google Christmas shapes in images & find some free downloads.

If they are not the right size, enlarge on copier or as in example below, trace then keep enlarging size till happy with finished size. **Remember to include 1/4" seam allowance**

Step 2:
Choose a variety of ribbons for your shapes. The patterned grossgrain I used in my first designs came in my Sew Box Subscriptions Nov Box, the patterned satin ribbons came from my local Spotlight. The plain grossgrain I had on hand.


Step 3:
Gather wadding scraps & Christmas fabric for backing, plain fabric for base piece under ribbon. **Ideal time to use up some scraps**

Step 4:
Cut rectangle of wadding & base fabric that you will be attaching the ribbon to. (You can sew ribbon directly onto wadding, but it is ideal to have a piece of fabric under ribbon which avoids wadding showing if any slight gaps between ribbon strips.)

Step 5:
Cut strips of ribbon & place on fabric/wadding base ready to attach.

Step 6:
Sew ribbon onto fabric/wadding base piece - I used a normal stitch but you could choose a fancy stitch if you wanted.

Step 7:
Place ribbon piece right sides together with backing piece.
Pin on pattern piece and cut out.

Step 8:
Remove pins & pattern piece, set backing piece aside for a moment.
Cut small piece of narrow ribbon for hanging loop. Stitch this securely to decoration shape. If adding button at base of bell, also add small strip of ribbon ready for button.

Step 9:
Repin backing piece right sides together with ribbon front piece & stitch around with a 1/4" seam. Leave a gap for turning through. Look for the 'straightest' part of your shape for this gap.

**If you want to 'fussy cut' your decoration as I did for the bauble shape, cut out shape, attach ribbon as per step 8, pin to backing right sides together, stitch seam, then trim off extra backing & proceed to step 10.**
Step 10:
Clip curves & cut off the corners. Turn through, push out corners carefully with preferred implement.
Pin gap closed & slip stitch gap.

Step 11:
Audition buttons for bell shape.

Add button to bottom loop of ribbon.

Step 12:
Hang on tree & enjoy. I also use mine instead of gift tags on gifts.

Totally Tutorials Blog

Tuesday 25 November 2014

It's Beginning To Look A Lot Like Christmas

I love, love, love Christmas! And this year I am finally able to get to the sewing machine & whip up some Christmas gifts, decorations & items for the home. As I mentioned last post, I recently subscribed to Sew Box Subscriptions & as part of my personal challenge to create more, have had heaps of fun creating different things with the contents of the Nov box (plus a bit of fabric from the Oct box thrown in).
I pop on some Christmas music & happily spend time in my craft room. My all time favourite Christmas album to sing along to is Casting Crowns, Peace On Earth. Along with traditional carols, they have some of their own songs, celebrating the birth of the saviour of the world.

Here is a summary of the past few weeks sewing creations.

"All Wrapped Up", a Christmas hanging I designed (tutorial on this hanging here.)

Decorations & gift wrapping ideas all sewn up. 

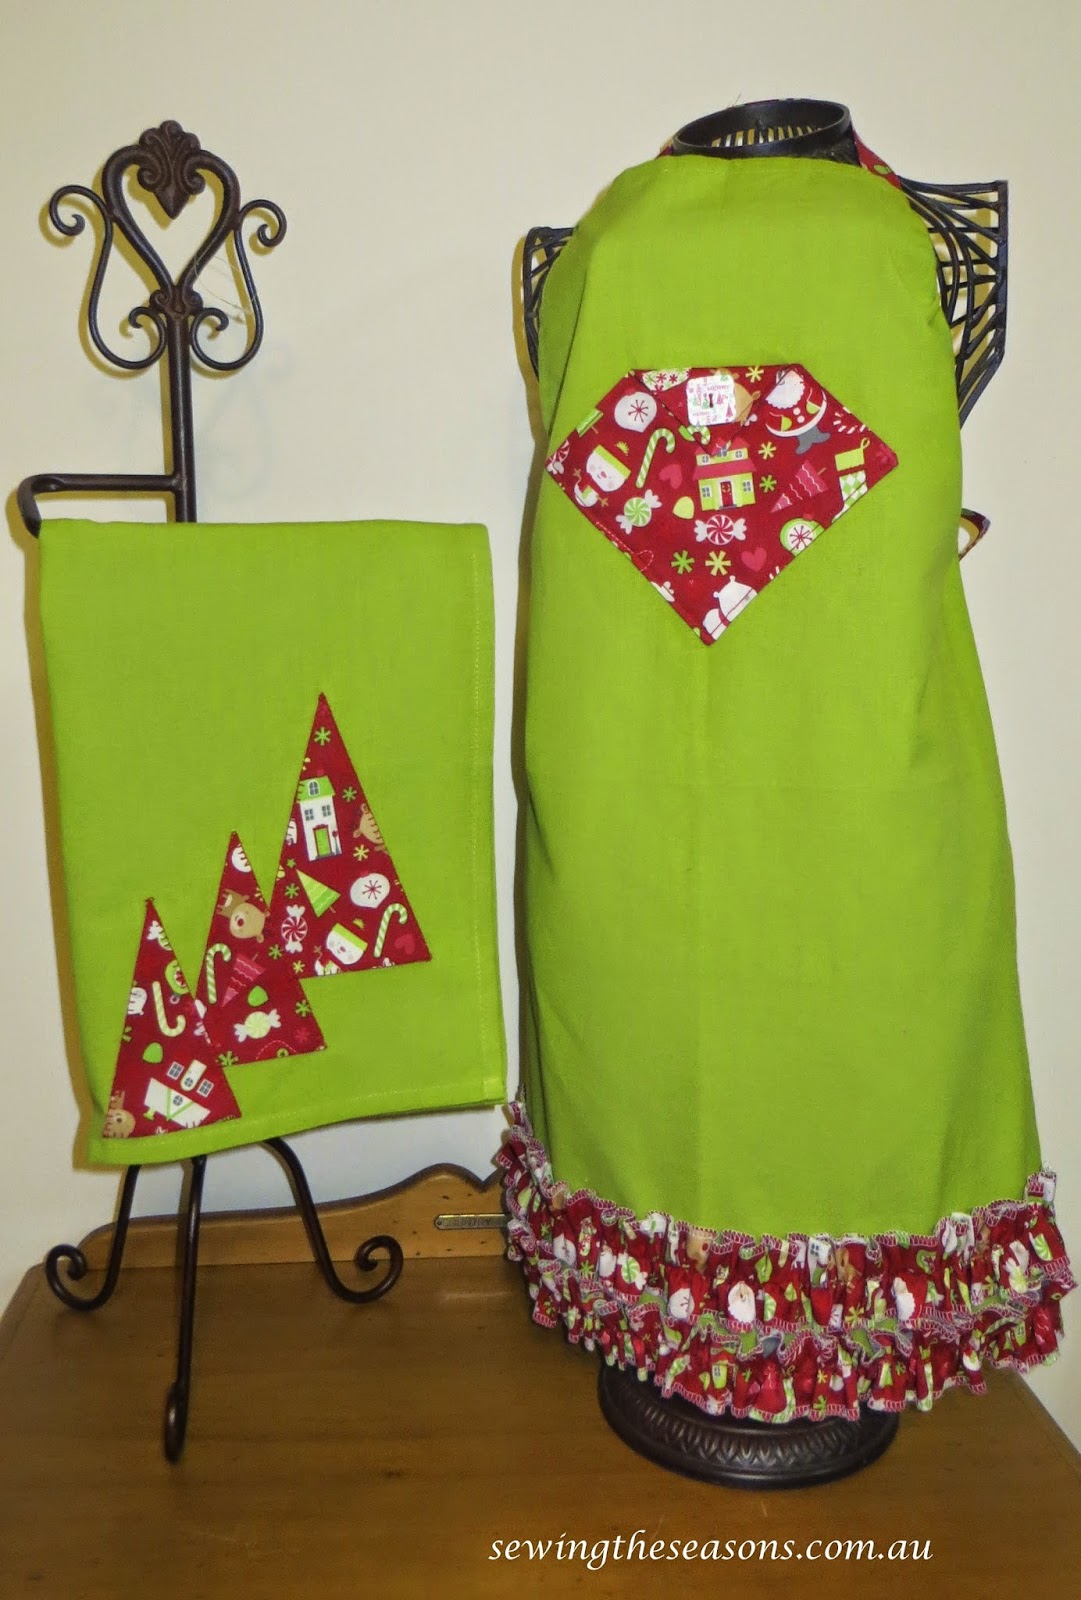
Christmas in the kitchen.
The tea towel was a great way to use up some of the scraps of Christmas fabric, simple applique using visoflix plus a button hole stitch on my machine. 
The green apron is based on a tutorial from the Missouri Quilt co, but I created my frill a little differently.

Half apron, also using a tea-towel.

Stay tuned, over the next few posts I will be sharing tutorials for the wine bags, decorations & aprons.

And finally, a very quick & simple project using some Christmas ribbon to decorate a hand towel, ideal as a gift or for your own bathroom.

Thursday 20 November 2014

Tutorial -All Wrapped Up - Christmas Hanging

I recently signed up for Sew Box Subscriptions, and when my November box arrived, found all these wonderful Christmas inspired treats inside. 

As part of the personal challenge I have set myself this year to create more, I set about designing a Christmas Hanging.
 I had so much fun playing with the fabric, trim & buttons. Here is a quick tutorial on how this came together.

Requirements: (to make hanging finished size 13" x 18 1/2")
Background & backing fabric: 40cm piece (NB for this one I used different backing fabric)
Fabric for frame: 40cm (needed for directional fabric, for all over pattern, 20cm)
Trim: 1yd/mt
Buttons: 6
3mm ribbon: various colours
Gold star button
Wadding or pellon (iron-on if preferred) 14" x 20"
Thread: to match fabric & also trim when attaching tree.
Hanger of your choice - 14" for these measurements

All seams 1/4" (except the join in backing piece - see notes)

1. Cut background fabric to required size (mine was  9  x 14 1/2")

2. Add frame strips = cut two 3" x 14 1/2" for sides, two 3" x 13/12" for top & bottom (NB - cut length of fabric for sides & across fabric for top/bottom if fabric directional)
3. Attach a piece of iron on pellon to back of framed piece (if you're not using iron on, would need to pin or tack wadding in place)
4. Pin on trim in tree shape (just letting you know I actually repinned & then sewed mine 3 times till I was really happy with result)
 
5. Add button as wrapped gifts at base of tree, the number of buttons to your liking or depending on size of your design.
 To make wrapped buttons. Sew a piece of the 3mm ribbon at back of button - leaving button holes clear, once secure cut off excess.
(Sample picture using contrast thread to show step, could also use glue gun.)
 Then wrap from back another piece in opposite direction & tie a bow. Trim ribbon. 
To attach to hanging, I sewed on using button holes as guide, coming up one hole, from above the ribbon, then going down other hole below the ribbon. Next stitch I came back up the first hole from under the ribbon and crossed over going down the other hole above the ribbon - this formed a cross stitch effect securing the ribbon bow as attaching the button.
(Sample picture uses contrast thread to show cross stitch effect.)

6. Attach button/star/decoration of your choice to the top of the tree.
7. Attaching the backing:
  Cut backing fabric into 2 pieces - 13 1/2" x 16 1/2" and 13 1/2" x 3 1/2"
Join across the width (13/12") of the backing pieces with 1/2" seam.
(Handy Hint -I use two backing pieces with gap across back of hanging for turn through -  this method means I sew completely around the hanging when joining the front to the back, turning through the gap made in the backing piece. This ensures a much neater finish to the hanging.)
join the two pieces with a 1/2" seam. I change stitch length to a long stitch for about 3-4" in the middle of this join, then change back to normal stitch length to finish the seam (reverse stitch at each end of short stitched line). Press seam open then unpick the long stitches - giving you a neatly presses gap to turn through before sewing up.
8. Pin hanging & backing right sides together. Sew all around with 1/4" seam.
 9. Turn through the gap in backing piece, slip stitch gap closed.
 10. Attach your hanger and display your finished 'All Wrapped Up' hanging.
Totally Tutorials Blog

Sunday 16 November 2014

Hospitality With a Mystery Twist

 This weekend was hospitality weekend at our church, always a great weekend as we get to share a meal with people we've been matched with by the organising team, people we may not normally mix with or know as well. This year, both our morning & evening congregations were involved, mixing our young adults with families or those of us who may have been round a bit longer.........
I love these times as we get to chat & discover more about others, find mutual interests or have our horizons expanded by what others are studying or doing in their lives. This year I was a guest for a Saturday night dinner at Sue & Keith's house with Dan, Luke & James, 3 of our amazing young adults who serve our church in our youth, children's & worship ministries.
During the week I'd had a call asking if I was game to have a 'not so typical dinner' which rather tickled my fancy, the meal was to be a mystery so Sue & Keith prepared the whole meal for us rather than asking us to bring one of the courses on the night. The guys arrived with no clue of what was to come................
 Once seated, the mystery was explained, we had our menus with 20 clues listed on them. There would be 4 courses, & each course would have 5 'items' in them, whether it was cutlery or food.
Let the fun begin! Sue was to eat whatever I picked, & Keith ate whatever Luke had chosen..... bit of pressure there to ensure we made some kind of reasonable choice. James & Dan had their own choices. Some of the clues were quickly solved (thanks to Luke for humming the Pizza Hut theme for clue number 1), others were complete mysteries adding to the fun of the night. I circled the clues I was fairly sure were cutlery to hopefully spread them out over the different courses.
We all hoped we didn't end up with all our cutlery in one course............ (someone who will remain known only to us did manage to pick his knife, fork & straw for first course......)
  
And so the adventure began, (my apologies, these photos won't win any competitions but hopefully show the fun of the night)
Who knew 'baked anthracite' was coke (OK science was not my strong point) but thankfully I chose that for 1st course along with  "Titanic's demise" so had my ice cubes in my glass of coke, not on my plate as happened for some of the others, but I did have to eat my jelly with my fingers..........
By sheer fluke, I also managed to pick the straw ('Pharaoh denied this') with my glass of water ('used in Cana') for my 2nd course, & it wasn't too bad to spread my butter with a fork, making a ham roll.
3rd course became a bit trickier as I had chosen a knife in the same course as my peas & corn. (Sorry mum, that knife did go in my mouth, but I was careful, so I could eat my veges......)
I knew I had chosen a spoon for 4th course with the ice-cream, but didn't realise that was the course I had chosen the carrots & celery ('healthy twigs'). Couldn't resist a quick 'snowman' sculpture before eating the final course for the night.

 Here's a couple of snaps of some of our creative eating methods during the night.

Following the meal we all enjoyed a round of the game Sequence to round off a fun night (some people were very pleased each time they blocked a move from the opposing teams).
Sue & Keith hosted a wonderful evening, doing an amazing job of keeping all the food warm for whichever course we had chosen to eat it as well as being very creative with the clues they wrote.
We had one final group shot before heading home.
 This kind of night is a lot of fun, you could do this with any food combinations, creating your own mystery menu of clues.
Here are some more snaps of some of the weird & wonderful food/cutlery combinations that were enjoyed on the night.