Monday 21 August 2017

Split 9 Patch Pouch


 These pouches came about when I was pondering how to use up spare squares after I had constructed several of my Urban Charm Tote Bags and Table Runners (pattern release coming soon.)

As several people have asked how I made these pouches, I decided to share a tutorial for anyone interested - always happy to share ideas or designs.

One framed 9 patch square will make two pouches.


All seams 1/4" unless otherwise stated.

Material Needed:
  • 9 x 5" charm squares
  • 6 strips - 1 1/2" wide x 5" long
  • 2 strips - 1 1/2" wide x 16" long
  • zipper (I used a 12" one and cut down)
  • 4 small pieces of fabric (approx 1/12" wide x 2" long) for zipper tabs
  • iron on interfacing or fleece such as Pellon H640 or Pellon (Legacy 971)
  • lining fabric cut to size of trimmed squares (approx 7 5/8" x 7 5/8") - one 20 cm strip will give you lining for both pouches
  • zipper pull if desired
Constructing The Pouch
  1. Lay out the 9 charm squares in a pleasing pattern (note for instruction pouch I was using sample fabrics with only a few colours from a range).
  1. Chain piece the shorter strips to the 9 squares then press.
  1. Add the longer strips between the rows then press.
  2. Cut the framed 9 patch into quarters (I press the piece in half to find the centre of each side)
  1. Trim the squares, cut iron interfacing to size & attach, then quilt as desired.
  1. Zipper - cut off end of zip, sew tab pieces right sides facing zip the fold back, press and trim.
  1. Line up zip with top edge of pouch so tab is sitting 1" in from side edge. Open zipper (so you don't cut tab off!), cut off ends of zip approximately 3/4" in from edge of pouch. Attach tabs, turn, trim and press (you can choose to have shorter or longer tab pieces - I find this size gives a good finish.)
  1. Attach zip to top of pouch - lay zip face down on right side of fabric and sew (you can use a zipper foot if desired, I find my normal foot works well). Note - You can play with which edge of the square you have at the top of the pouch = I choose to lay each side so the frame pieces don't meet on the side or base seams.
  1. Lay lining right sides to other side of zip - you are encasing the zip here between the lining and outer fabric. 
  1. Stitch along each edge. Turn & press.
  2.  Topstitch.
  1. Pin pouch right sides together - outer fabric to outer fabric, lining to lining - ensure you have zip tab folded down towards lining side.
  2. Stitch side seams. Stitch across base of outer pouch. Stitch across base of lining - leave approximately 2 - 3" for turn through.
  3. Cut box corners = cut out 1" corners, measuring from seamlines, not edge of pouch.
  1. Stitch across box corners ( make sure you match up side seams.)
  1. Turn pouch through - pushing out box corners to give crisp finish as well as tab pieces (hint - I find it helps to clip into seam allowance near tab pieces - but don't cut stitching!)
  2. Finish gap where you turned through either by hand using a ladder stitch or on machine close to fold.
  3. Add zipper pull.
  1. Stand back and admire your pouch.
 
I would love to see any photos of pouches others make.

Until next time,
Robyn 

Thursday 29 September 2016

2 Towels + 3 Nighties = 12 Cleaning Cloths

For some time now I have been wanting to repurpose some of my nighties & towels into cleaning cloths & today was the day.

My soft knit nighties have seen better days (you know how they get after wear around the neck line & arm holes) but are so soft & comfy I just kept wearing them but the time had come to retire them & treat myself to some new ones.

I had a couple of towels that I wasn't using, one because it had scrunched up at each end when washed & the other one a lovely fluffy towel that had been a gift but not used as it doesn't match my decor.

So today I repurposed them into some soft, absorbent cleaning clothes.

After cutting off each end of the towels, & trimming off the edges, I cut them in half lengthwise & then cross cut them each into squares (each of my towels yielded 6 x 12" (30cm) squares.

I chopped off the top of each nightie just below the button placket & then cut out 12" squares from the skirt pieces.

For the first few, I sewed them on my machine using my walking foot, turning them & topstitching them closed, even trying cross hatching across one.

But then I decided to try using my overlocker & decided this was quicker, easier & a better finish.......I didn't fuss toooooo much about perfectly straight sides or evenly finished squares - they are just cleaning cloths after all! (Quite freeing for the inner perfectionist in me.)

So just a short time later........ 2 towels + 3 nighties = 12 Cleaning cloths. 
They are so soft & absorbent, quick to grab & can be washed & reused as needed.

Until next time,
Robyn

Sunday 10 April 2016

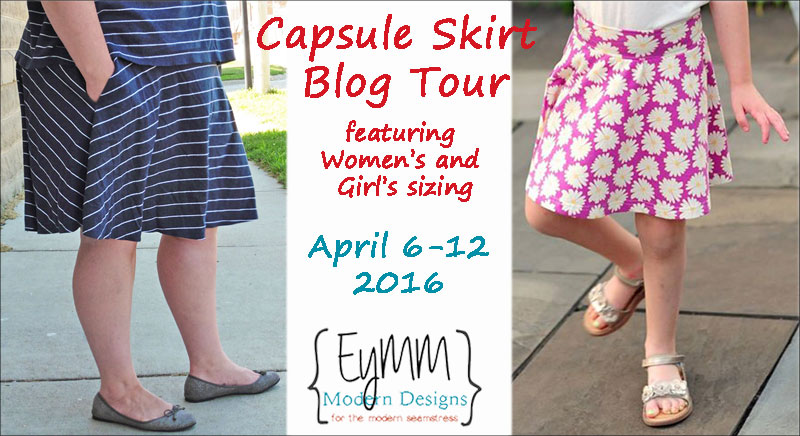
EYMM Capsule Skirt Blog Tour

Welcome to Sewing The Seasons and the EYMM Capsule Skirt Blog Tour
(check out their Facebook page here).
I love sewing with EYMM patterns and was so excited to be included in this current tour.

The Capsule Skirt is the first EYMM pattern I made last year when I was fortunate enough to be included as one of the pattern testers.

Kymmy's patterns are so clearly written, easy to print off, and her instructions, diagrams and pictures make sewing a breeze. If you are new to knit sewing I would recommend this pattern as one to try, I can't see how one could fail.

I had recently purchased this glorious fabric from Smoogie Fabric and Design but wasn't sure whether to use it for the EYMM Active Wear Leggings or the Capsule Skirt....as you can see the skirt won! So many colours mean so many options of what to wear with this  one.                                                      


 Same skirt, just an example of
3 different looks, ideal to take you through the changing seasons........


 Some helpful details: 
  • pattern sized XS - 5X (yes those of us more curvy are included in the EYMM pattern range), 
  • hints for lengthening/shortening skirt, 
  • maternity option & varying hem line for fuller figures all clearly given in the pattern instructions.
  •  from cutting to sewing time - under an hour! 
  • this version I left a tad longer than my previous ones due to work requirements


As we head into Autumn (Fall) down here in Australia, I am planning several more Capsule Skirts as they work so well with leggings or boots, a truly versatile item to take me through the various seasons.

Follow these links if you want to see some of the other Capsule Skirts already in my wardrobe...


                         Here's some amazing other blogs to check out, I love being part of a blog tour and discovering not only other blogs but seeing the finished items from round the world.

2016-Capsule-Skirt-Tour-web
Make sure to check out all the other stops on the EYMM Capsule Skirt Tour. (Note: The links won't be live until the day they're scheduled, but feel free to click through and check out†other blog posts any time.)
Wednesday, April 6
Thursday, April 7
Friday, April 8
Saturday, April 9
Sunday, April 10
Monday, April 11
Don't forget to pick up your copy of the pattern†while it's on sale! †Use coupon code PERFECTSKIRT to save 25% on the Women's Capsule Skirt, Girl's Capsule Skirt, or Capsule Skirt Bundle until April 12 at 11:59pm PST.

Until next time, 
Robyn

Friday 18 March 2016

Pattern Release - HunnyBunny Basket


When Leesa from SewBox Subscriptions contacted me and asked me if I could design a basket for Easter, maybe with a bunny and chook design, my ideas started flowing. Rather than the more traditional round basket, I went for more of a bag shape which led to other ideas...........

What followed was the HunnyBunny Basket

Simple steps give you the option of a bunny with ears or a cheeky chook.

The basket can be made from any fabric and depending on the thickness of the iron interfacing used, will have a very soft or more structured look. This is a quick sew project too.

I gave some of my sample bags to a friends 3 & 4 year olds and they carried them around for over an hour as they played - a huge hit right there!

This pattern is really versatile, made in pretty floral with a lace trim and you have the ideal basket/bag for a young girl to keep her trinkets or hair ties in.


I can also picture this in bright chook or farm fabrics, ideal as a kitchen tea or housewarming gift filled with treats or even freshly laid eggs from your chooks.

The design lends itself also to a baby shower gift basket, pick some cute baby fabric and fill with some gifts for a new bub.

Pattern is available from my Craftsy store here.

I would love to see any HunnyBunny baskets you make, pop back with some pictures to share.

Until next time,
Robyn

Sunday 21 February 2016

Craft Show - Old Friends and New Discoveries

For the second year now, Stitch - By Craft Alive has held a show at Castle Hill, just a few minutes from home. I really like these smaller shows and especially that it is so close to home! An opportunity to support small businesses from around the state, easy parking and opportunity to meet and chat with the stall holders.

Saturday morning my friend Marilyn and I met for another wonderful few hours of browsing, shopping and fun.

I caught up with Maureen from Stitch Between the Bridges in Tamworth (way back in the 1980's, Maureen ran an amazing fabric and yarn shop in Baulkham Hills and I spent a lot of time there.) 

It was great to catch up with Karen and Brendon from The Stitching Post. We have met them at a few shows but also thoroughly enjoyed a weekend retreat up the mountains last Oct that they ran. If you are looking for a fun weekend of stitching, yummy food and lots of laughter, check out their page and the information on this year's retreat.

Shows such as this give you the opportunity to meet new store owners, discover new businesses that also offer online services if you like their product range.

I was excited to come across a new business by the name of Mercier. Marie is so friendly and I loved her style of stall presentation and range of fabrics and nick nacks too. You can check out her facebook page here. 

I've signed up for her "Happiness Is..." club, love having the opportunity to discover new designers, patterns and fabrics. 

Oh and see those cute scales in the background of the photo? A set is now sitting happily in my guest room holding some Tilda fabrics..........

I also managed to pick up a couple of kits to do when I manage to find the time.

A great day and look forward to next years show. 

Until next time,
Robyn

Monday 1 February 2016

Summer Sewing

Over the summer break I managed to whip up a few items for my wardrobe - all colourful & easy wear.

As I've shared before, I love the EYMM Active Wear Leggings, such a great pattern & this hydrangea fabric was too pretty to pass up from Boo designs right here in Australia.


I also wanted a couple of easy wear dresses to pop on in our how weather so decided to trace a pattern off one I like wearing from my warddrobe.

This super bright and cheer knit is easy care & I receive lots of comments when I wear this one.

Same pattern but different fabric & slightly shorter due to the amount of fabric I had to work with.
Love the fact that knits are such easy care fabrics to work with & wear.

Whilst it's a bit too warm to wear the leggings as yet, am looking forward to some slightly cooler days to pop these on.

Until next time,

Robyn

Saturday 19 December 2015

Christmas Baking Day

Life has been busy and it's awhile since I've had a chance to post, hopefully over holiday time I can update you all on some of all the exciting adventures and events of the past few months.

This past week Christmas holidays started here and on Thursday I had just the best day catching up with friends and baking. Olivia is an amazing young lady I met this year when she hosted a fundraiser for Red Kite (Cancer support charity). At only 16, this young lady has already achieved so much and I love her passion for serving and helping others. Along with her sister Sophia, they are members of our local Hills Youth Army, volunteering to help at local events through our local council. When they asked if I would like to come over, spend the day baking the answer was a resounding yes.
Of course, what Christmas baking day would be complete without Christmas aprons? So last weekend, I whipped up a set of aprons for the girls, their mum Julia and myself. 
Thursday was such fun, the aprons a huge hit and we achieved a lot. 
Two batches of cupcakes, some choc chip cookies, two trays of my chocolate fudge and some Oreo Balls later (oh and the additions of some antler ears) and we had finished.
After a quick stop and rest for lunch, we finished our preparations and they plated up the goodies onto some trays.
Olivia had wanted to do the baking to say thank you to our local Police, they are amazing group of men and women who she wanted to bless and I was happy to play a small part in the day.

Here is Olivia handing over one of the trays to one of our local Inspectors. Such a simple idea, maybe it's something you might consider?
Until Next Time,

Robyn