Monday 21 July 2014

Learning To Crochet

Crochet has been one craft I have struggled with over the years, despite several attempts to learn, being a leftie has always seemed to be a stumbling block. BUT - last Saturday, I attended a 4 hour class & can now do some basic crochet. Am rather excited & rather impressed that I have achieved a new skill.
When I saw Kim Bradley Creations, my local patchwork store advertising a crochet class, I popped in & asked Kim to check if the teacher would be willing to teach a leftie. Not only was Cath willing, she taught herself to work left handed to ensure she could help me - oh so very thankful for her skill & patience.

Here is Cath getting us started. 
 We had a choice of yarn & hooks to work with on the day.
 Getting started - Cath had thoughtfully provided a mirror for me to use but I found it better just to sit beside her watching.
Finally underway chaining & learning how to wrap the yarn over my hand.
First attempt at double crochet along the chain before we realised I was doing it a bit whole lot wrong, missing a step in the stitch, but really we often learn better from our mistakes......
Finally underway with my first granny square!!!!!!!!
4 hours later & a great sense of achievement. 
The lovely Cath even provided us with a needle for sewing in the threads.
 
Here are a few of the granny squares from the class along with a little bag Cath made to show how we could use ours. Mine may be smaller than the others but I really don't mind as this leftie has mastered a new skill!!!!!!!
So a couple of days later, a reworked chain & double crochet sample & this is where I am up to:

 Stay tuned for the finished project.

Monday 14 July 2014

Savvy Sewing Savings

Let's face it, sewing isn't always cheap, so I am always trying to think of ways to get the most out of each piece of fabric & every last inch of thread.
Here are just a couple of hints that I use to ensure I maximise my use of all that I purchase (especially as there are times when I need a particular piece of fabric or thread colour for a project & then have the left overs just sitting there.)

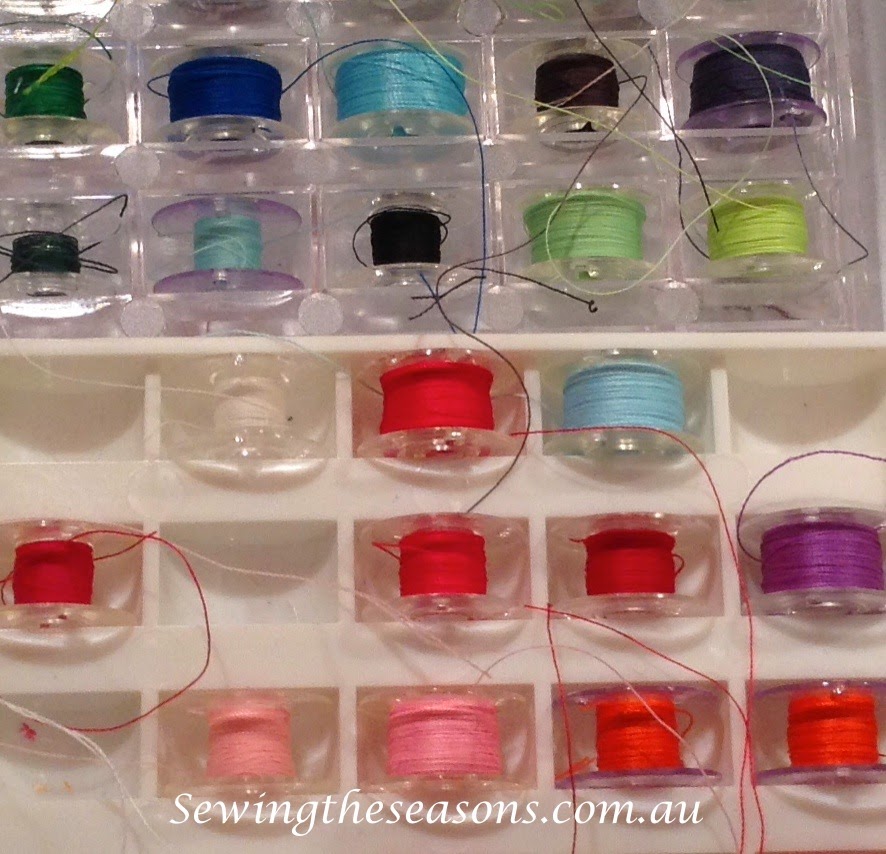
Utilizing Partly Used Thread Reels & Bobbins


Over time my bobbin box
& thread holders end up with 
partly used bobbins & reels
of thread.


Piecing multi-coloured quilts is an ideal time to use up these part reels & bobbins.
 Yes, it does mean changing the bobbin & top thread more frequently, but it sure gets through the build up! It also means I can use complete reels for special projects or items where colour/thread match is important. 
For the reels & bobbins with very short amounts of thread left on them, I keep those for hand stitching bindings, or sewing up some of the baby balls & soft toys I make.

Utilizing Fabric Leftovers

I have baskets under my ironing board - one for small scraps (tutorial using scraps coming soon) & one for selvedges. For ideas on how to use selvedges, check out my tutorial on  
When cutting striped fabric for runners or other projects,  I found I was collecting narrow strips of pattern between each piece for the runners. 
 After cutting the runners, I have a collection of strips & selvedge pieces.
 
 I keep these strips in a container & have found several uses for them over time. Stay tuned for ways to use these strips in coming posts. 
 
Any selvedge with at least an 1" of pattern attached goes into the selvedge basket.
If there are only narrow pieces of selvedge (depends on the pattern width of each fabric design), I then trim these into narrow strips & use them to attach my business cards/price tags for items being sold at markets.
 Maybe you have some other tips for utilizing threads & fabrics? I would love to hear them.


Tuesday 1 July 2014

Knitted Scrubbies

I've been so enjoying knitting the cotton cloths I posted the other week, I wanted to see what else I could knit as gifts. When I googled knitted scrubbies, I found a pattern for The Tribble. I had a go at one, then also checked out what other knitters had done with The Tribble.

After playing around with a few of the suggestions, I settled back on the original Tribble pattern, however, I count the number of rows needed for each one rather than measuring each time.

I wanted to clarify a couple of the terms used in the pattern and found Knitting Help easy to use, not only clear instructions but helpful video links as well.

As you can see, I've already knitted up quite a few, they are quick & easy, I've made a couple each night & feeling rather pleased I am on track with my Christmas gifts ahead of schedule!

I  use 5mm needles, cast on 18 stitches & knit 50 rows. I like to knit into the back for the first row to give a neat edge to my work. Make sure to leave the long threads as suggested in The Tribble pattern to use for sewing up. I cast off so that the threads are on the same side of the knitted piece.

After the first couple, I found I preferred to run a thread round the edge of each side & gather up the scrubbie then sew round again for strength before ending thread off.

These would also be ideal for removing make up or washing your face as the cotton is so soft. I am considering trying some in acrylic for that 'scrubbie' effect for dirty dishes.

Here's a few photos of my knitting & construction.

 Knitted piece 18 stitches, 50 rows, ends to stitch up on same side

       Stitching up the ends                                                                      Run thread round edge stitches   


 Gather up other edge                                                                                       Secure threads & knot off


                                            Flatten out finished scrubbie (tribble)